Students
Adding & Managing Students
This article covers adding, editing and managing students.
The student list
After logging in, click Students in the sidebar:
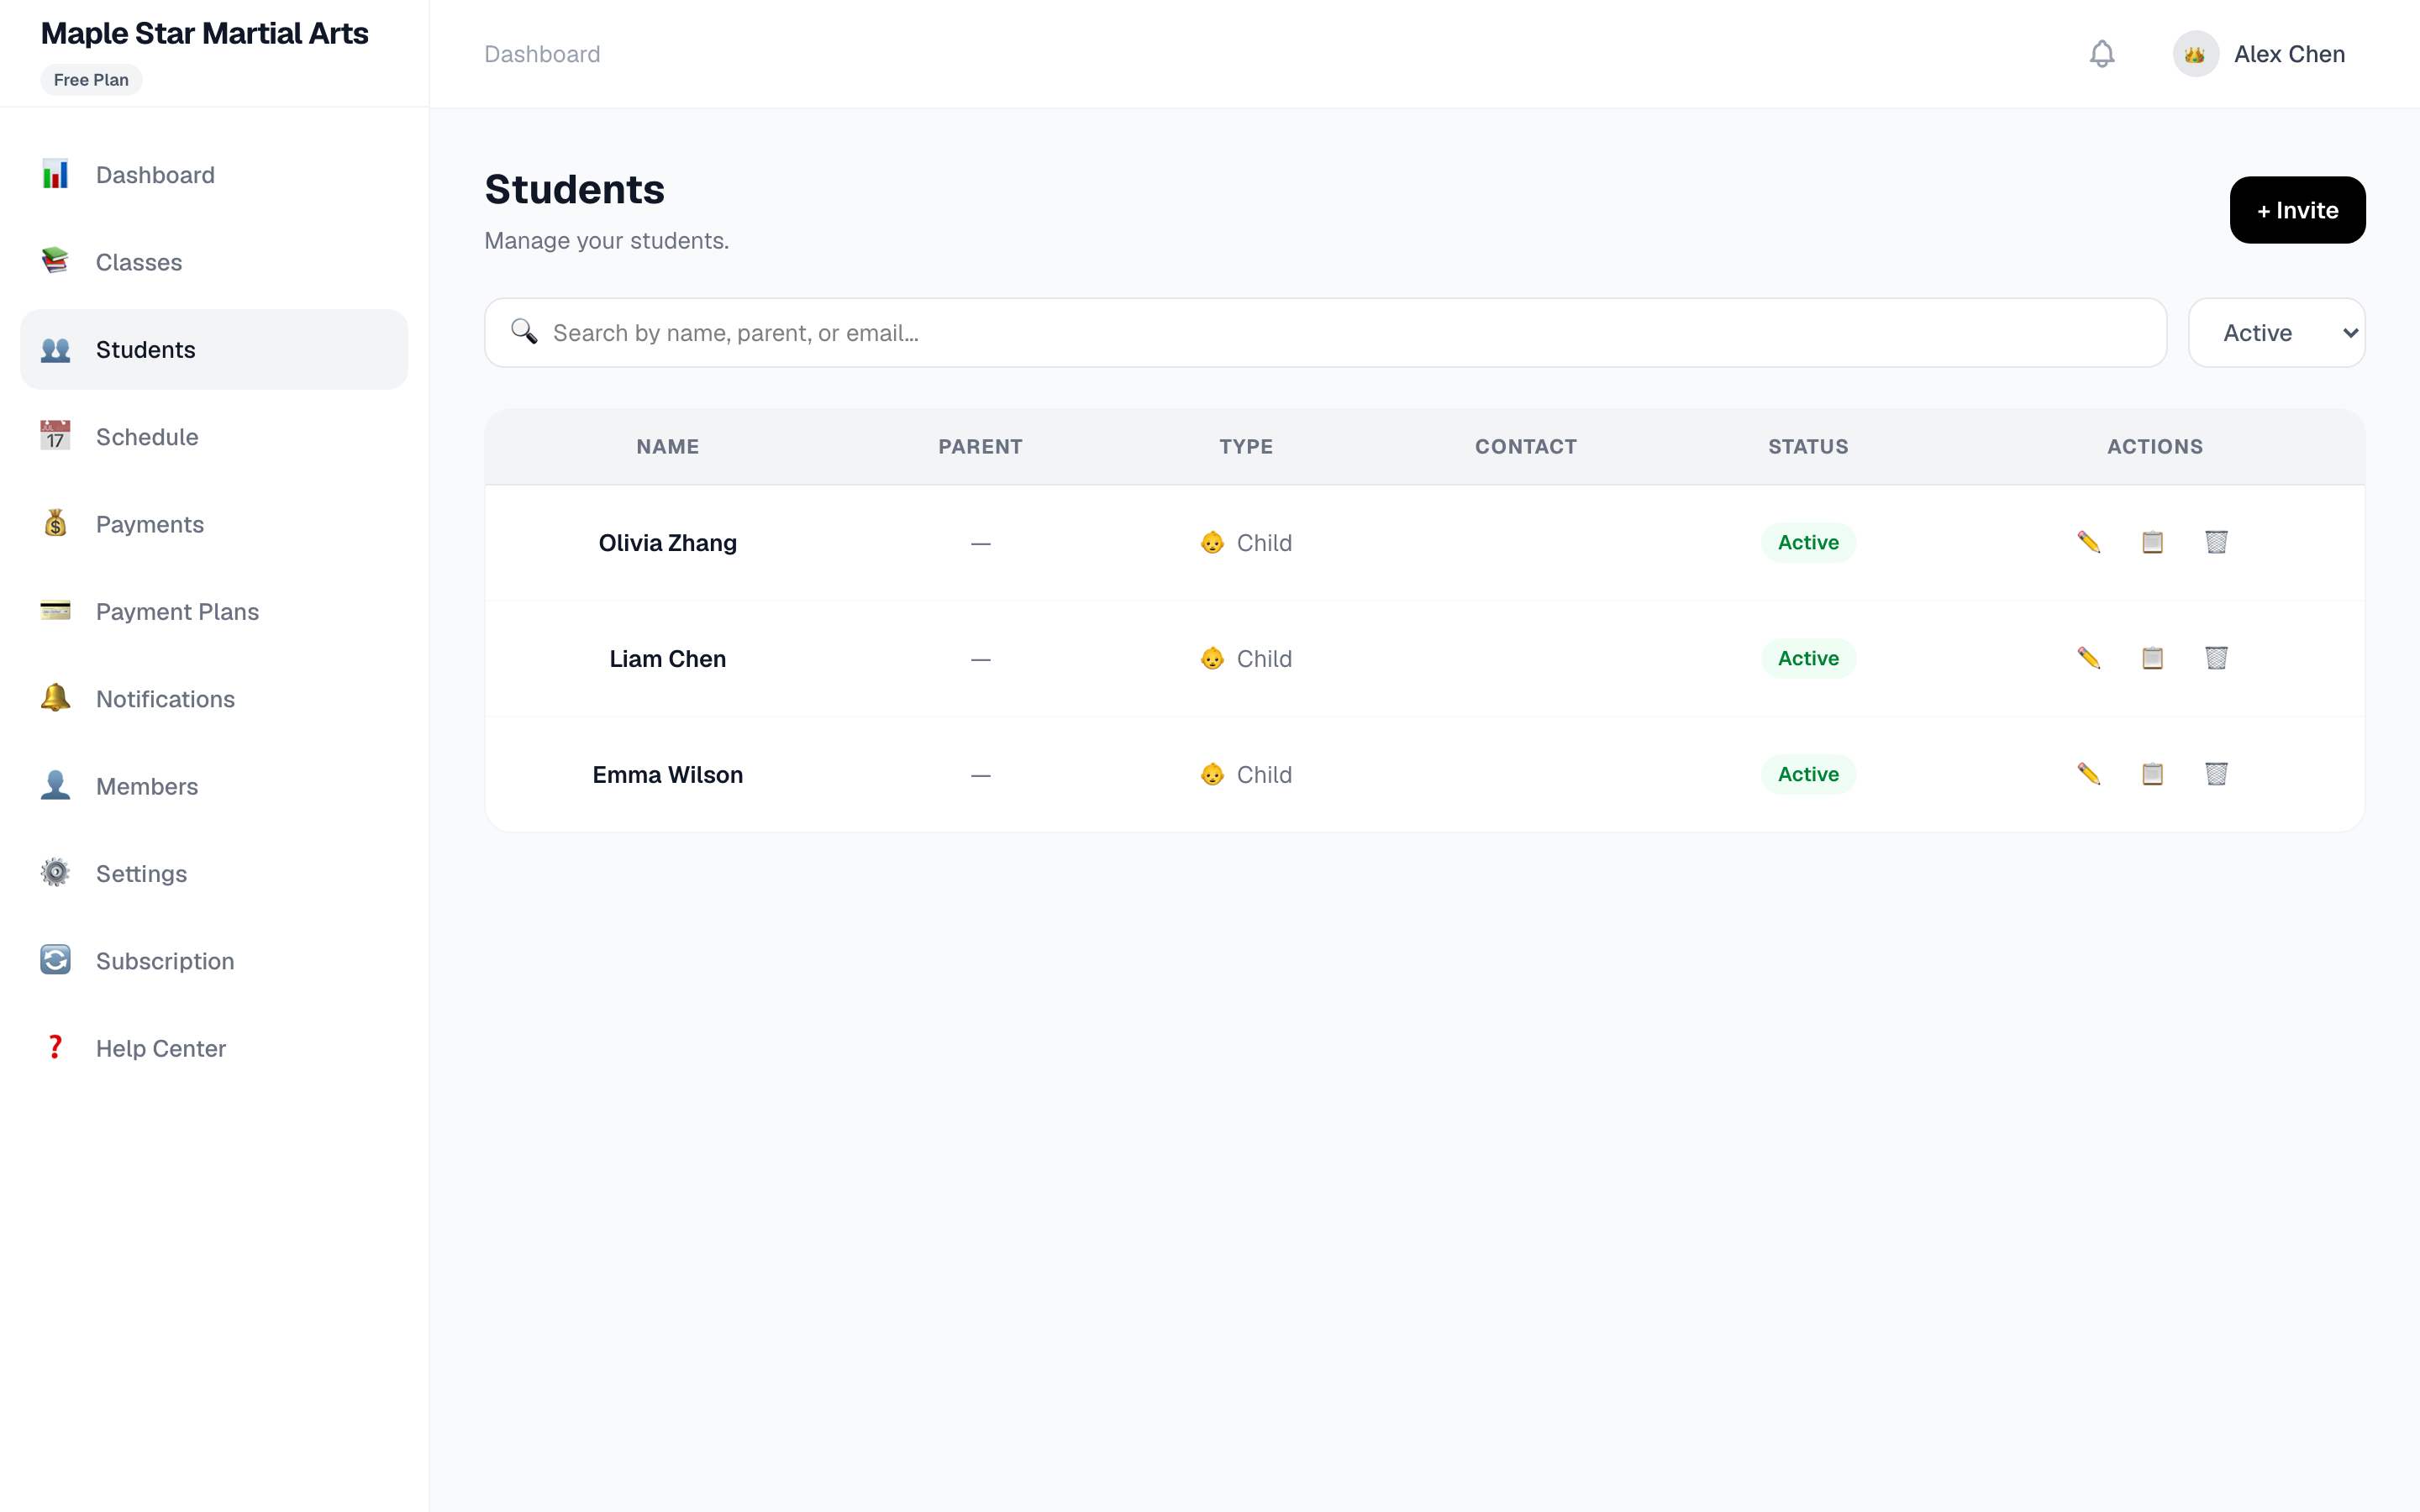
The list shows the following columns:
| Column | Notes |
|---|---|
| Name | Student name (first + last) |
| Parent | Linked parent account; — if not linked |
| Type | Child / Adult |
| Contact | Student's phone/email |
| Status | Active / Suspended |
| Actions | Edit (✏️), Enroll (📄), Remove (🗑) |
A search box (by name) and status filter sit at the top; paging kicks in automatically for larger lists.
Adding a student
Click the + Invite button in the top-right corner:
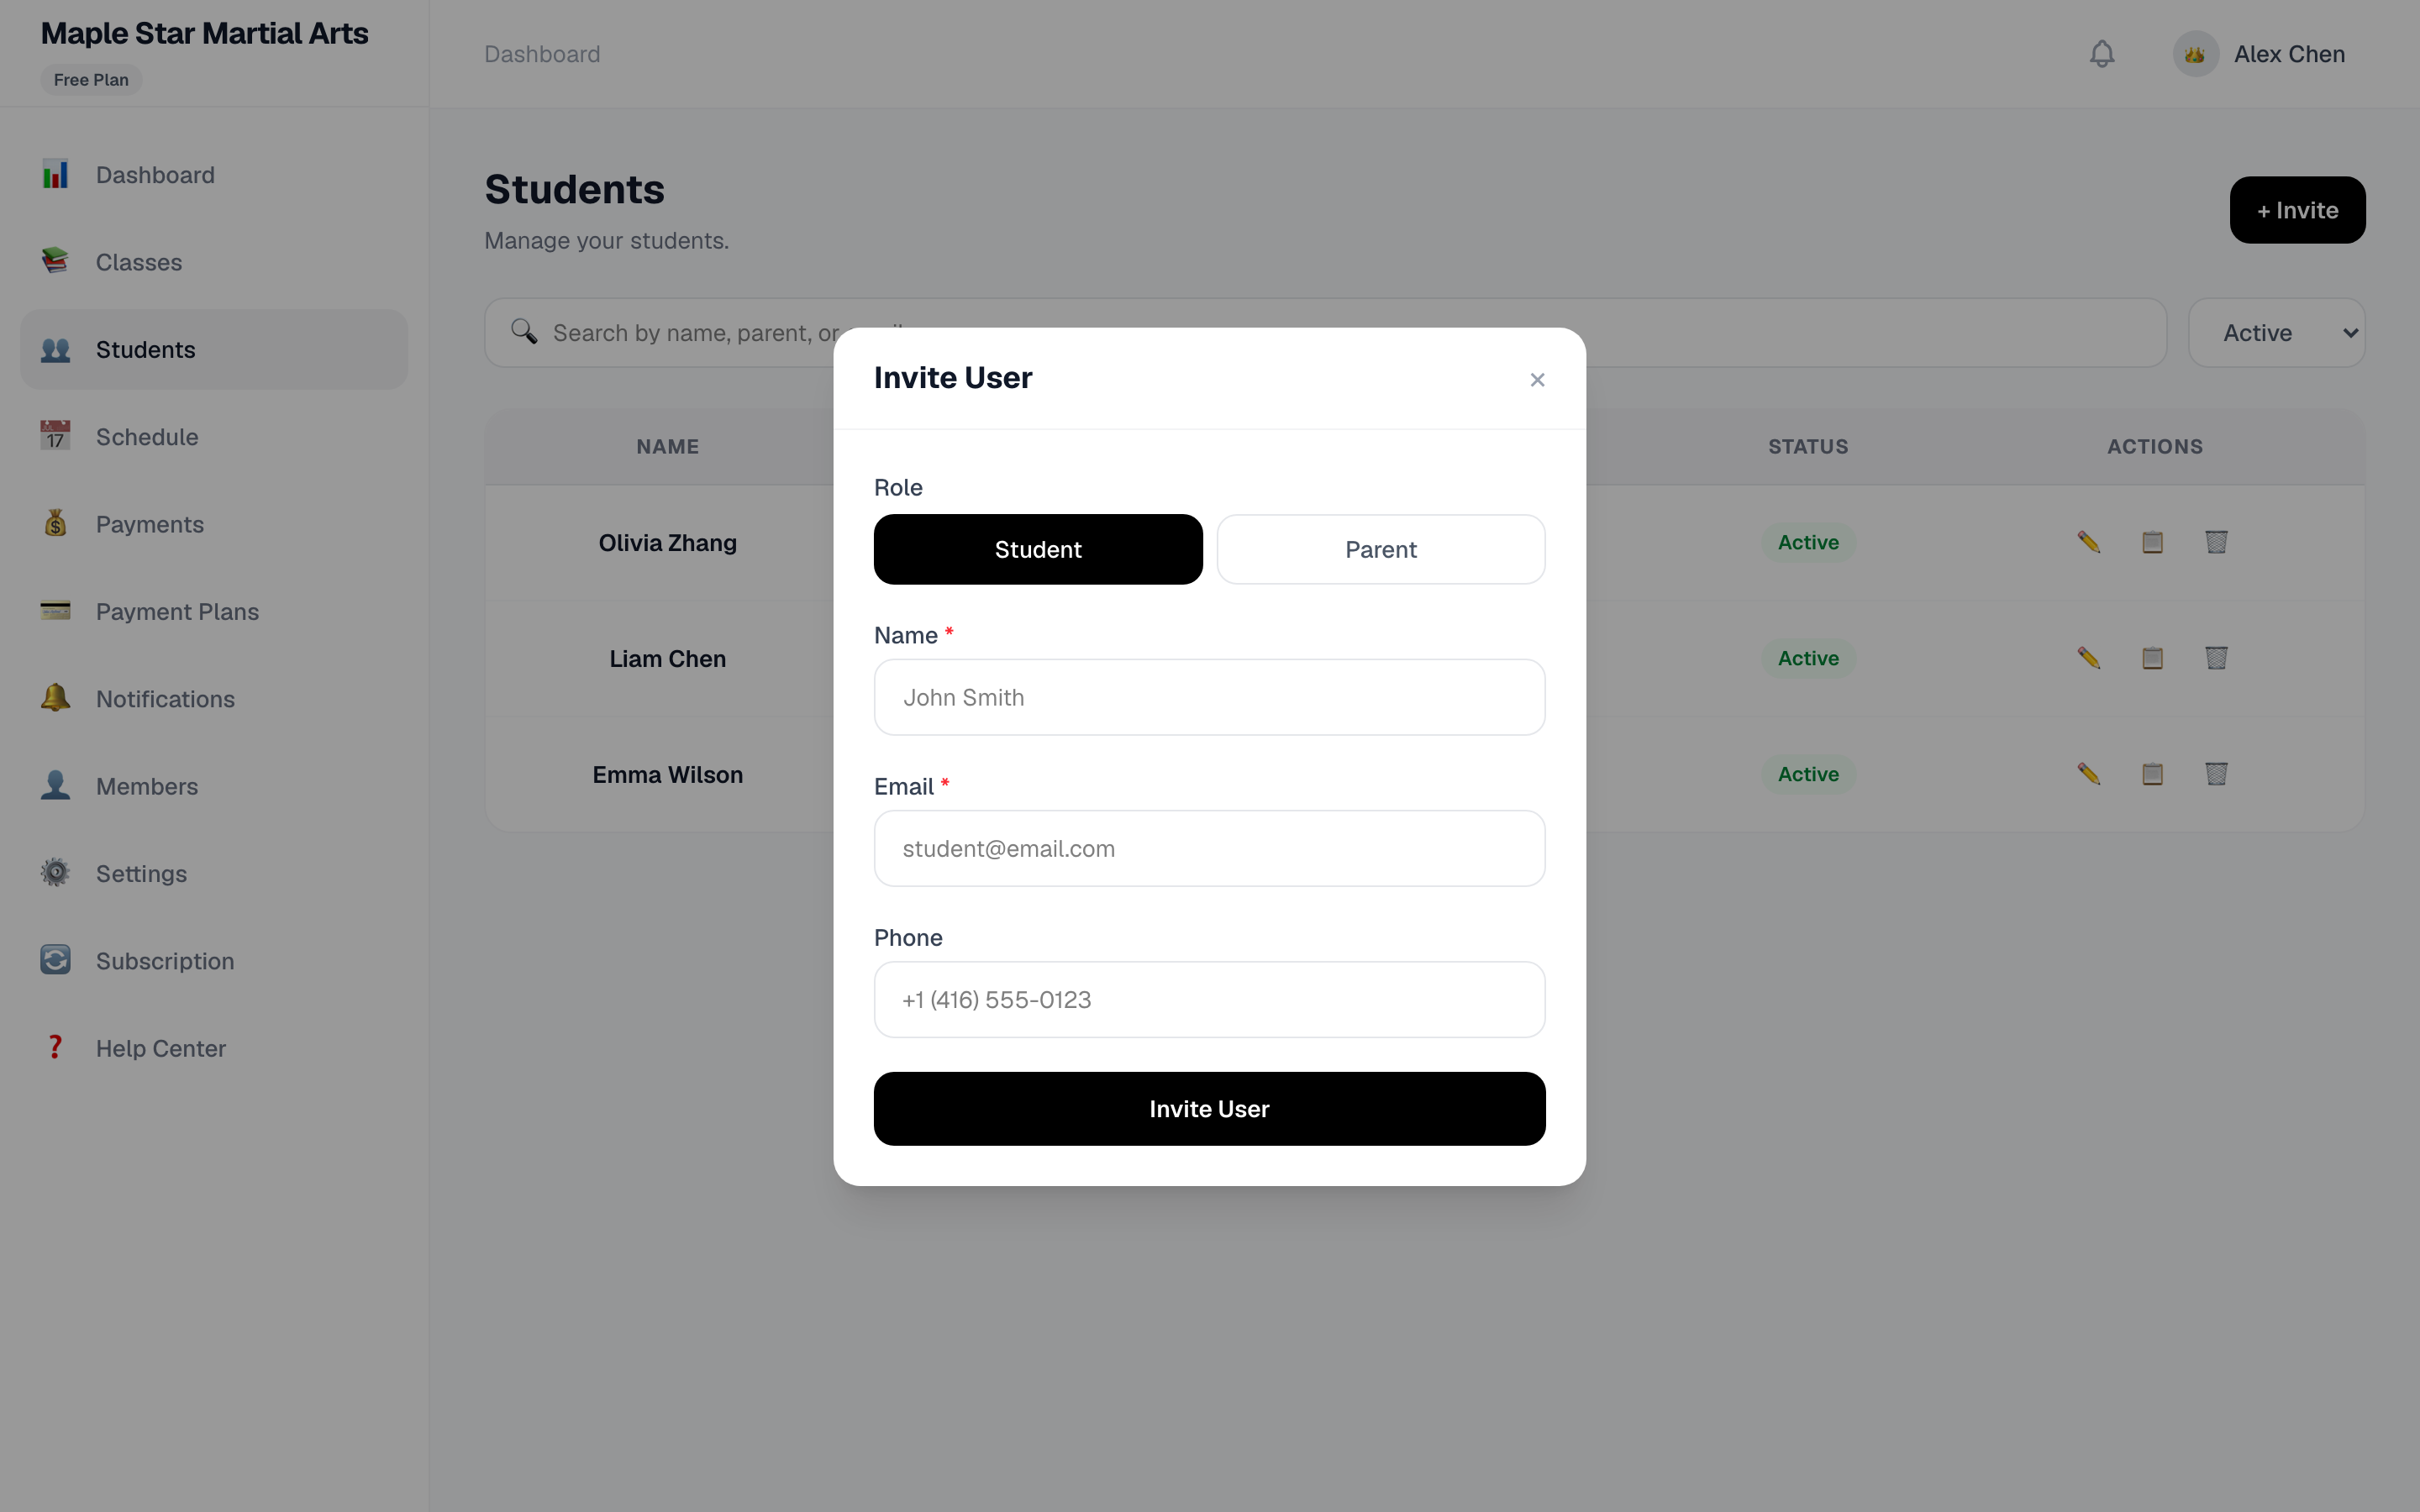
Two roles are available:
Student — create an account for an adult student or a student with their own contact info:
| Field | Notes |
|---|---|
| Name | Student's name (required) |
| Student's login email (required) | |
| Phone | Optional |
Parent — create a parent account and link it to the child. The parent receives a temporary password by email and can then see their child's schedule and bills.
💡 The student limit of your current plan is checked automatically — you'll be asked to upgrade if you exceed it.
Editing student details
Click the ✏️ Edit button on a student row:
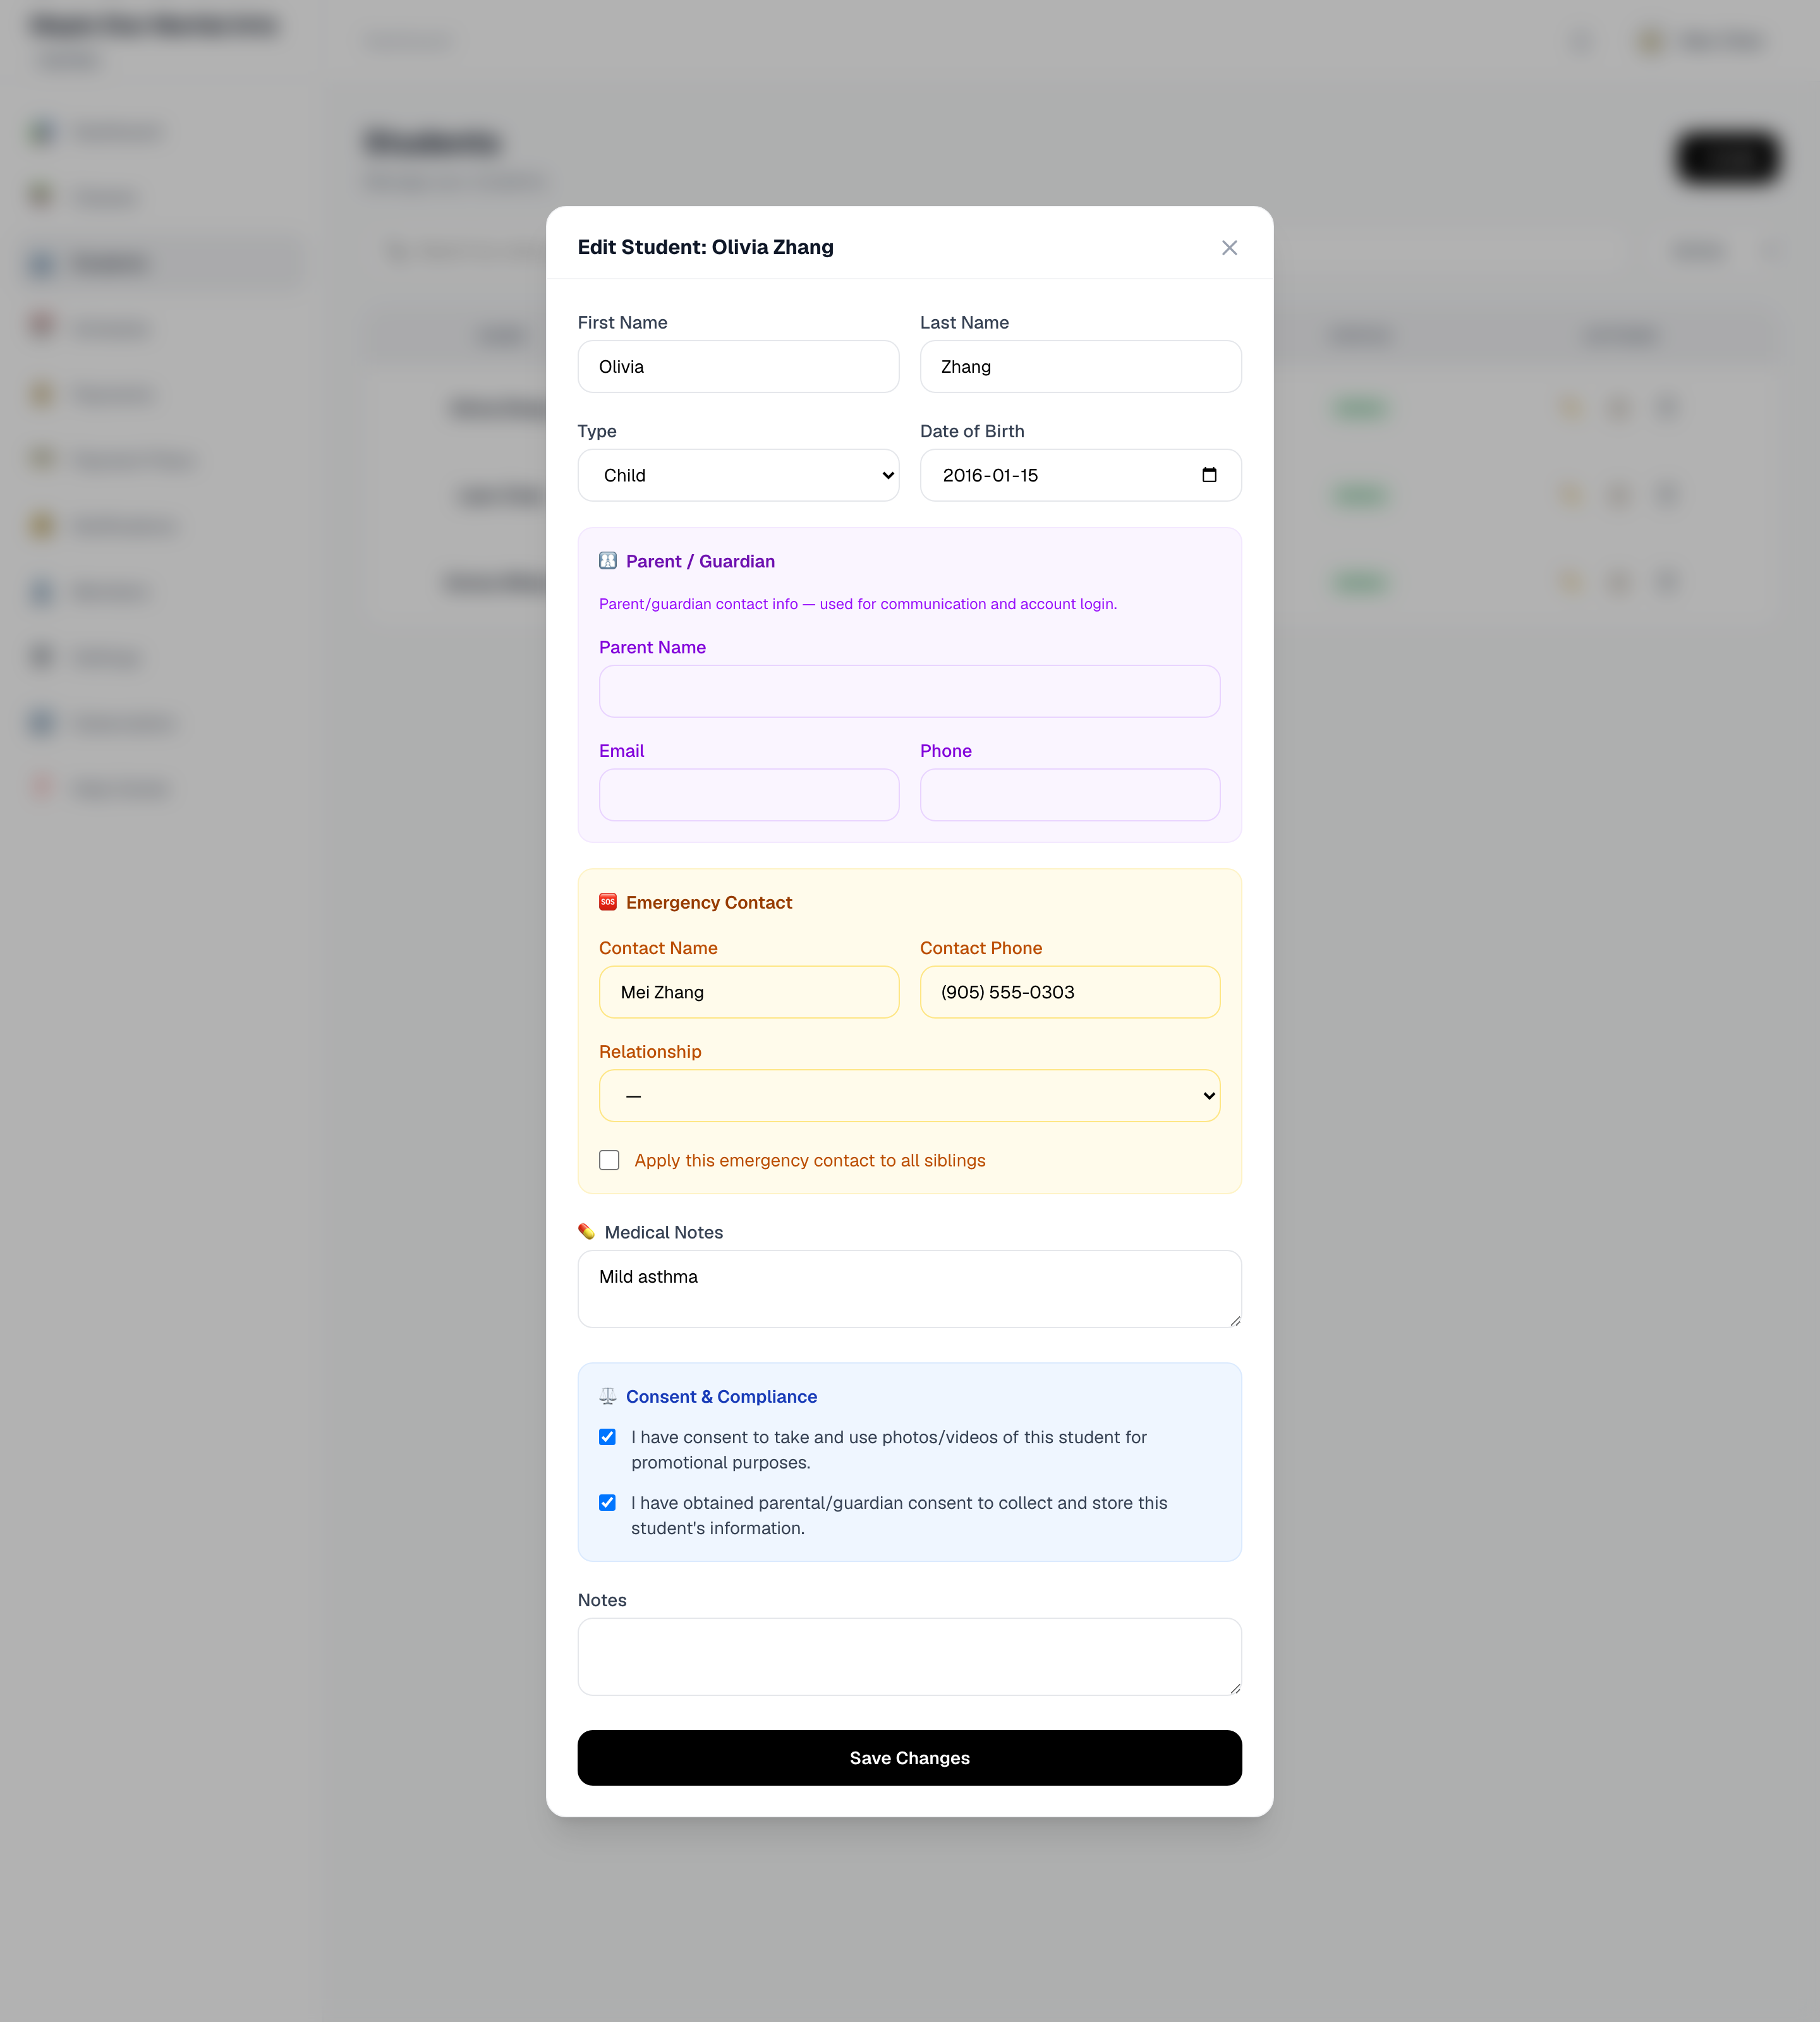
The dialog is organized into sections:
Basic info: first name, last name, type (child/adult), date of birth
Parent / guardian: parent name, email, phone — used for communication and account login
Emergency contact: contact name, phone, relation to the student; check "sync to all siblings" to copy it across
Medical notes: allergies, chronic conditions and other health info teachers should know
Consent & compliance:
- Photo consent: whether photos of the student may be taken/used
- Consent received: confirmation that parental/guardian consent was obtained to collect and store the student's information
Notes: anything else
Click Save when done.
💡 Fill in emergency contact and medical notes at enrollment — it matters in an emergency.
Enrolling in classes
Click the 📄 button to enroll the student in one or more classes. After enrollment, parents see the schedule in the parent portal and installment bills are generated automatically.
Removing a student
Click the 🗑 button to remove a student. After removal:
- The student disappears from the list and no longer counts toward plan limits
- Enrollment and payment records are kept (history stays intact)
⚠️ Limit note: if your studio is over its plan limit and operations are locked, removing or deactivating students is one way to unlock.